Create a Support Ticket System Using Rockety
Rockety is a powerful and flexible project management platform, designed with digital agencies in mind. Because of the flexibility of Rockety, you can use it to create a support ticket system for your business without needing any additional tools or software. This guide will walk you through the steps to set up a support ticket system using Rockety, ensuring that your team can efficiently manage and resolve customer support requests.
By using Rockety as your support board, you can keep your support tickets and your project management in one place. This allows you to easily track the progress of support tickets, assign tasks to team members, and ensure that nothing falls through the cracks, all without needing extra tools or software.
Step 1: Create a New Project in Rockety
Log into Rockety, and create a new project for your support ticket system. You can name it something like "Support Tickets", "Support Board" or "Customer Support". This project will serve as the central hub for all your support requests.
Step 2: Configure your Project Settings
You can set up your project settings in any way you'd like, but these are the steps we'd recommend taking to make the most out of your support board project:
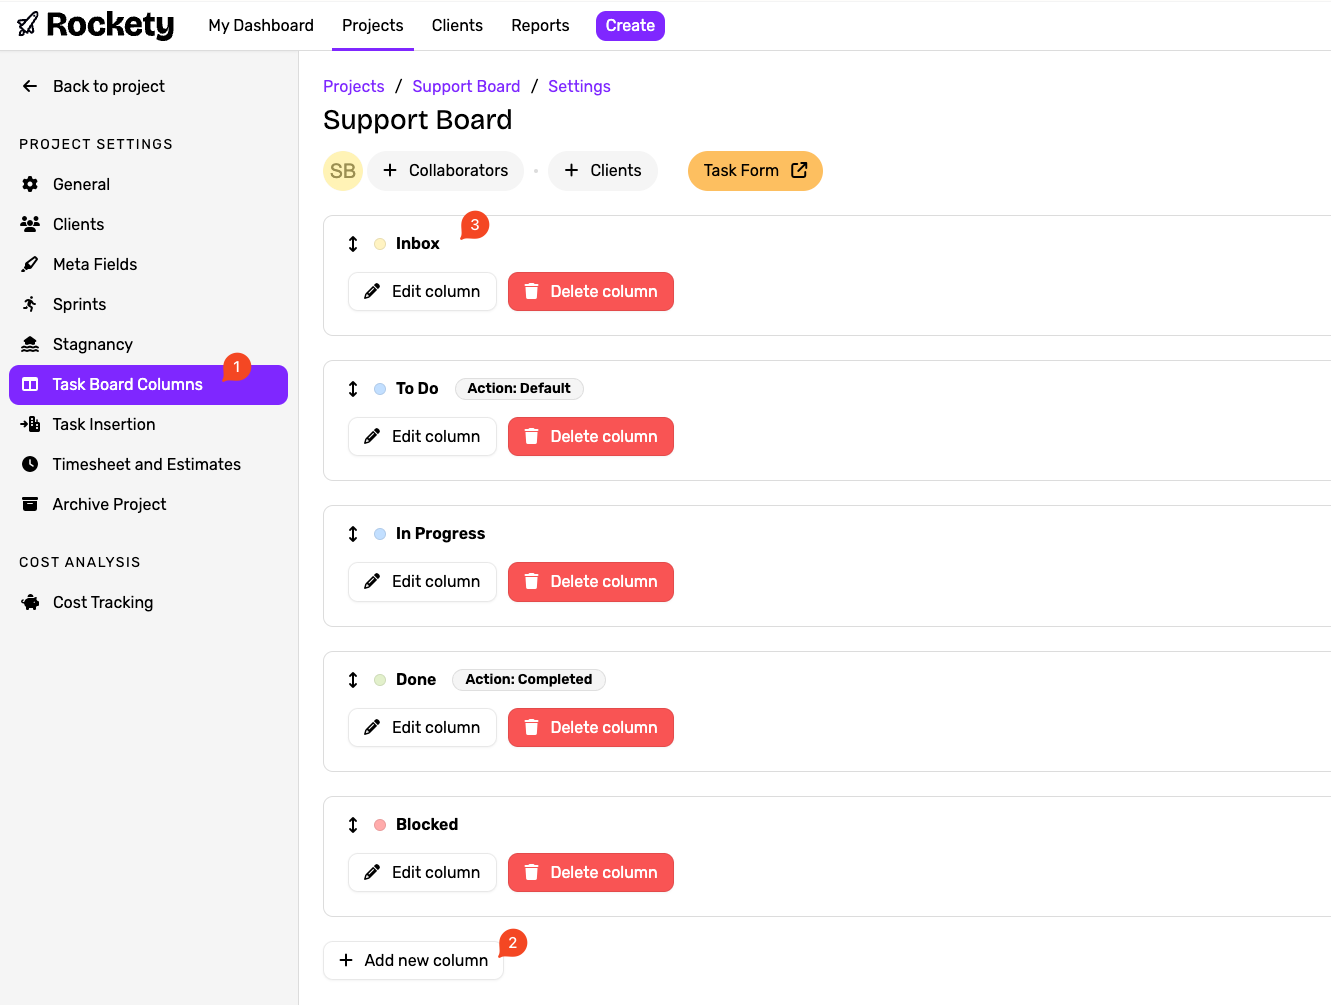
Create an "Inbox" column
In Project Settings, go to "Task Board Columns", and create a new column called "Inbox". Then, drag it up to be the first column in your project. This will be the first place that all new support tickets will go, and it will be the first place that your team looks when they are checking for new support tickets.
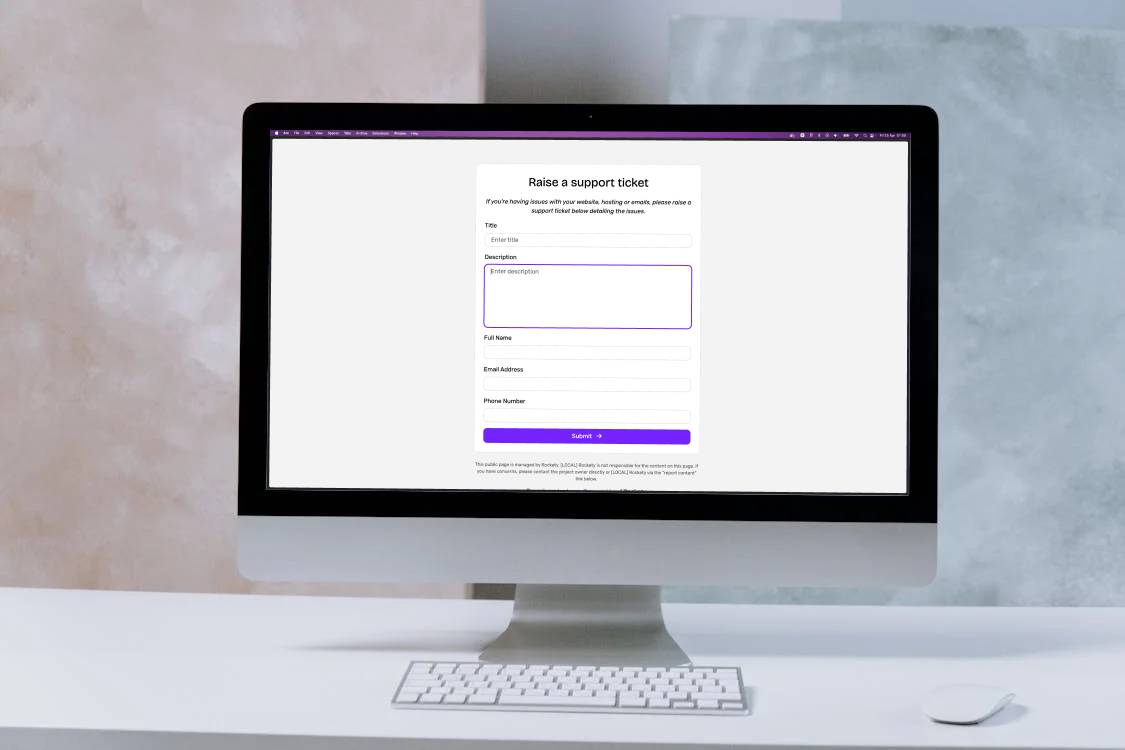
Enable Task Forms
Task Forms will let you create a form that your customers can fill out to submit support tickets. When they submit tickets, they'll automatically appear in your board.
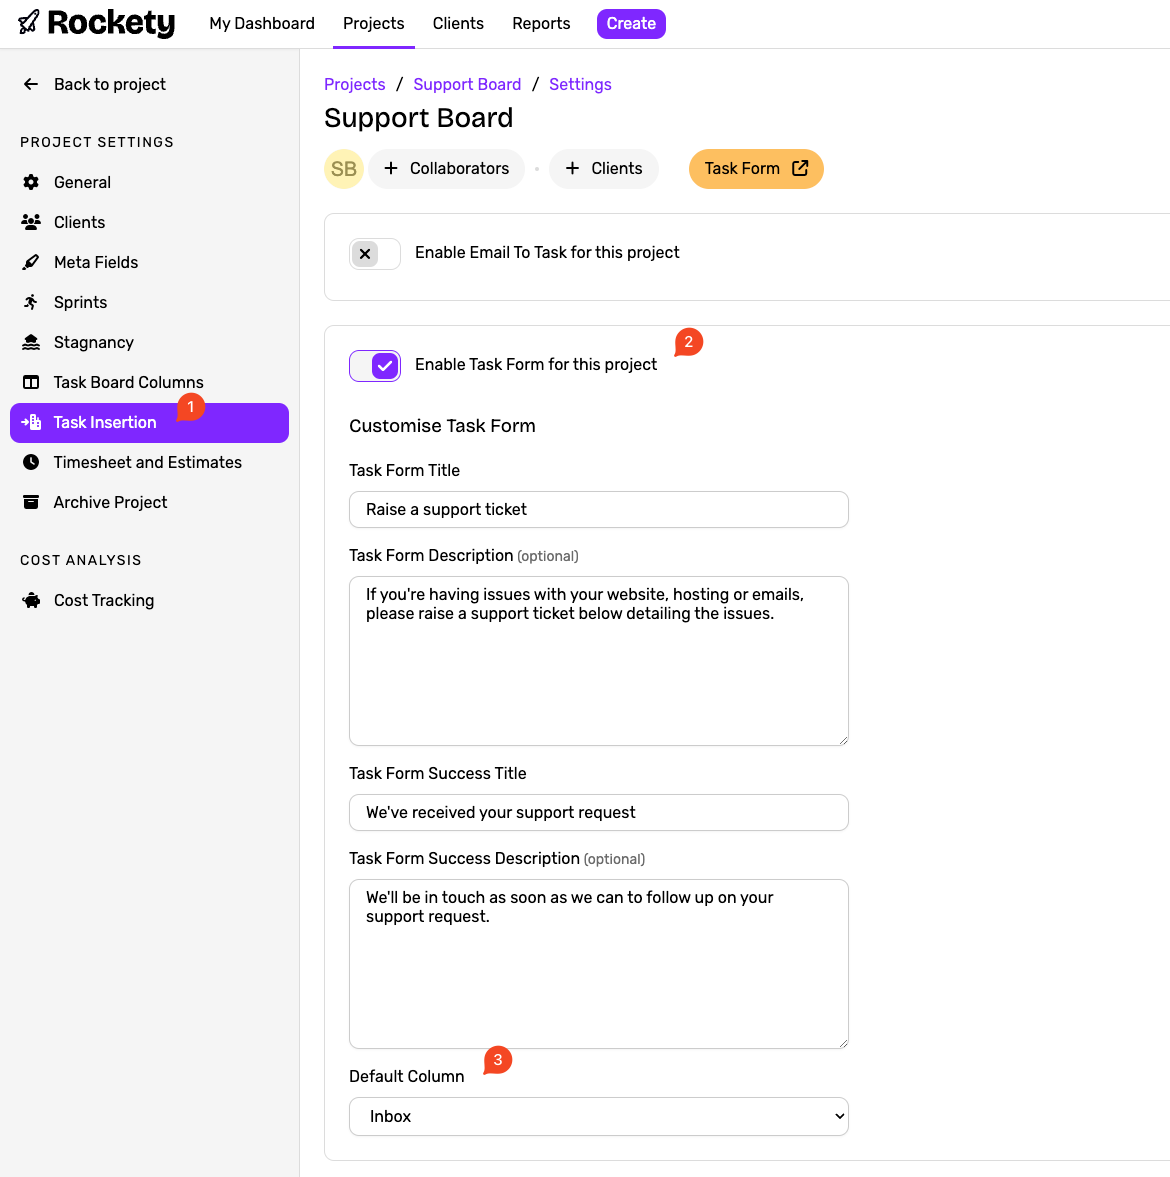
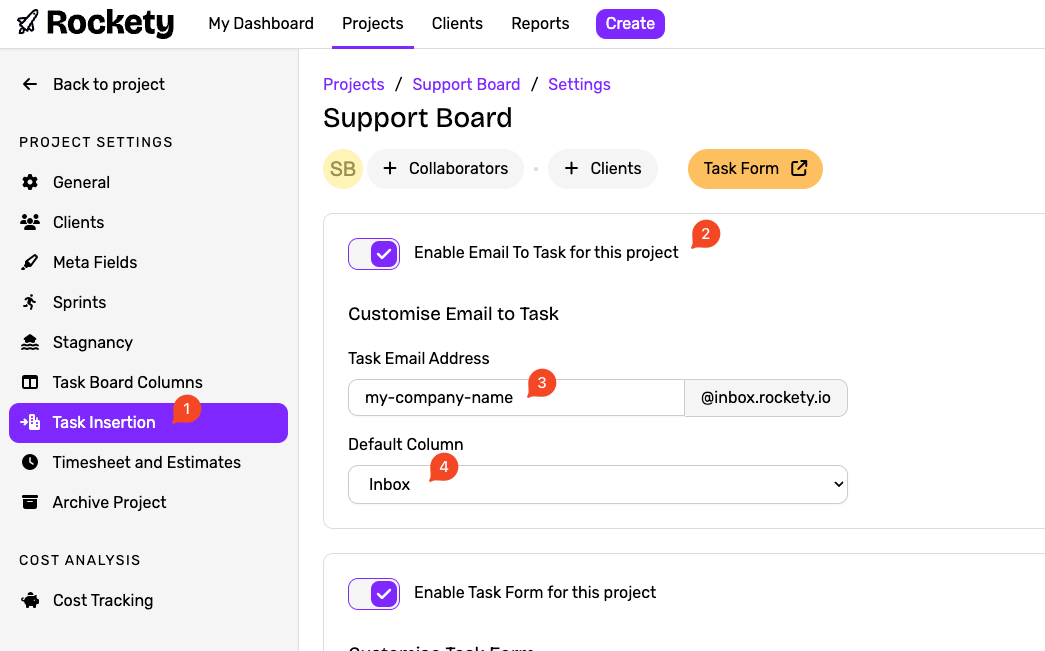
To enable Task Forms, go to Project Settings, and click on "Task Insertion", then click on "Enable Task Form for this project". From here, you can overwrite the labels of the fields on your form to match your needs. For example, you can change "Task Name" to "Support Ticket Title", and "Task Description" to "Support Ticket Description".
You can also select the default column that new tasks will be created in. Make sure to select the "Inbox" column that you created in the previous step.
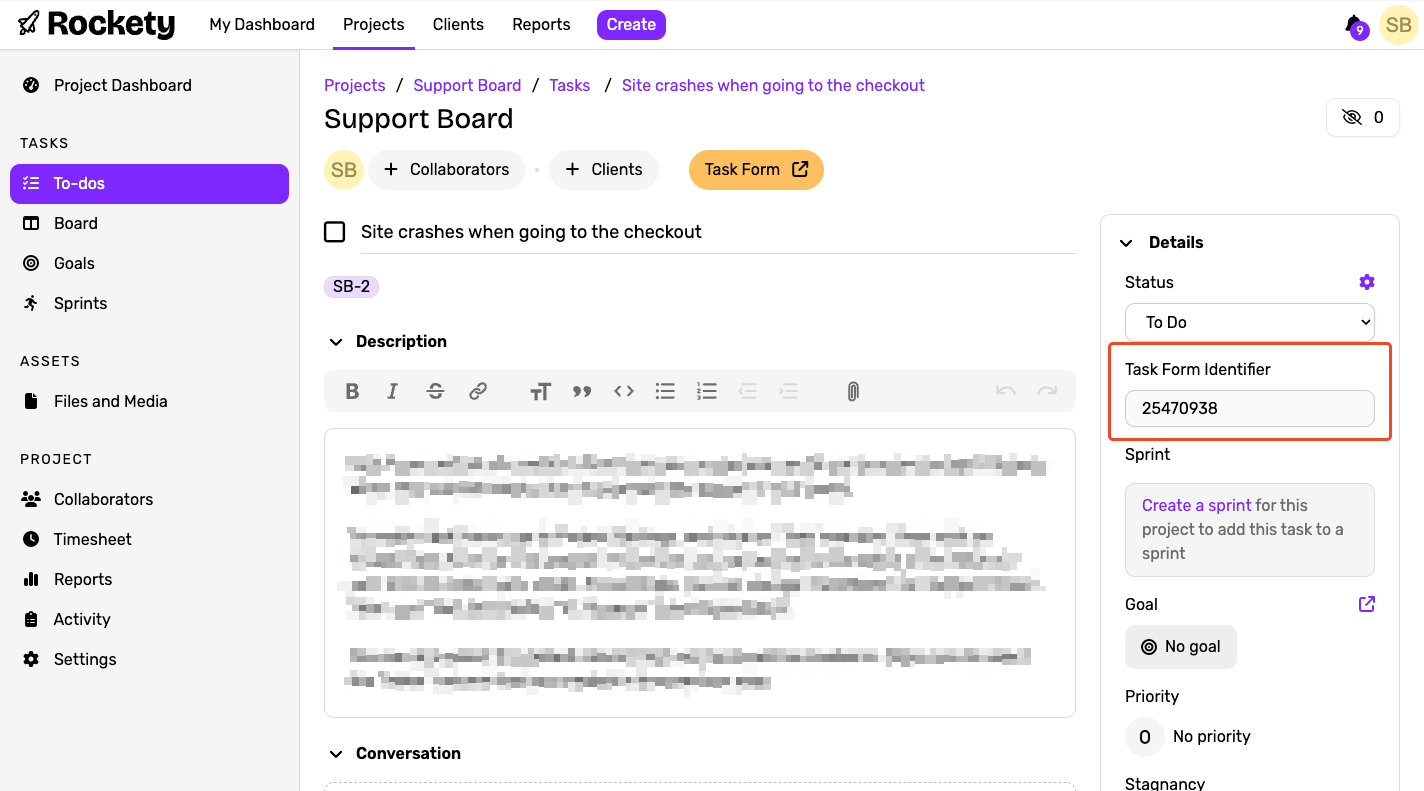
When a task is created using the Task Form, we'll automatically create an "external" identifier for it. This is different to any other identifier in Rockety, but can be shared with your customers as a reference to the issue they are having.
Enable Email to Task
Whilst you're in the "Task Insertion" settings, you can also enable "Email to Task". This will allow you to create a unique email address for your project, and any emails sent to that address will automatically be converted into tasks in your project. This is a great way to allow customers to submit support tickets via email.
To enable Email to Task, in "Task Insertion", click "Enable Email to Task for this project". You'll then need to set an email address for your customers to email to - it'll be something @ inbox.rockety.io. These email addresses are unique to every project within Rockety (even across organisations!), so your best bet is probably to set the email address to your business name.
Finally, don't forget to set your default column to "Inbox" again, so that all emails sent to this address will be created in the Inbox column of your project.
Once that's set up, you can share your new Rockety support email address with your customers, and any emails sent to that address will automatically be converted into tasks in your project.
Create Meta Fields for your Task Form
By default, your Task Form will just ask for a title and description. However, you can add additional fields to your Task Form to collect more information from your customers. For example, you might want to ask for their name, email address, or the type of issue they're experiencing.
In your Project Settings, head to "Meta Fields". In here, create the fields that you want to collect from your customers. For example, you might want to create a "Name" field, an "Email" field, and a "Type of Issue" field.
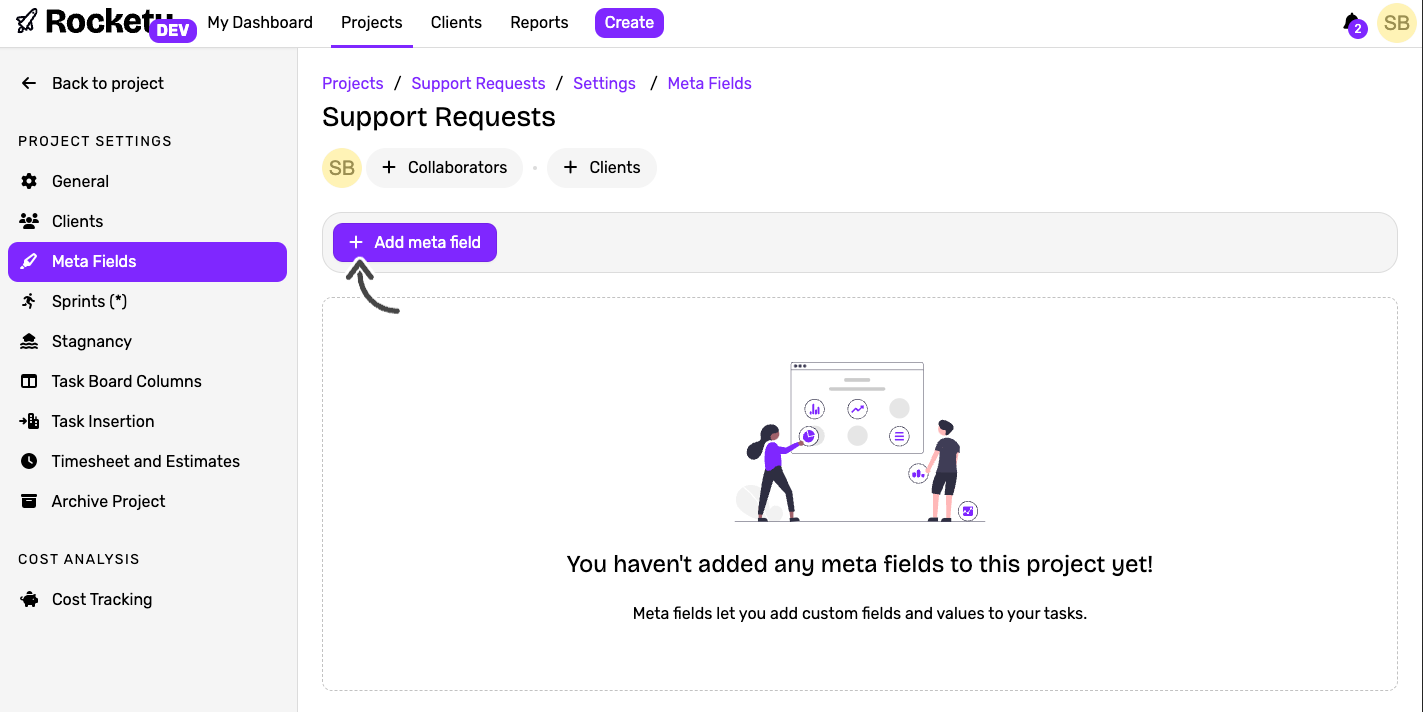
Then, in each field, edit the field and check "Show meta field on Task Form". This will make the field appear on your Task Form, and your customers will be able to fill it out when they submit a support ticket.

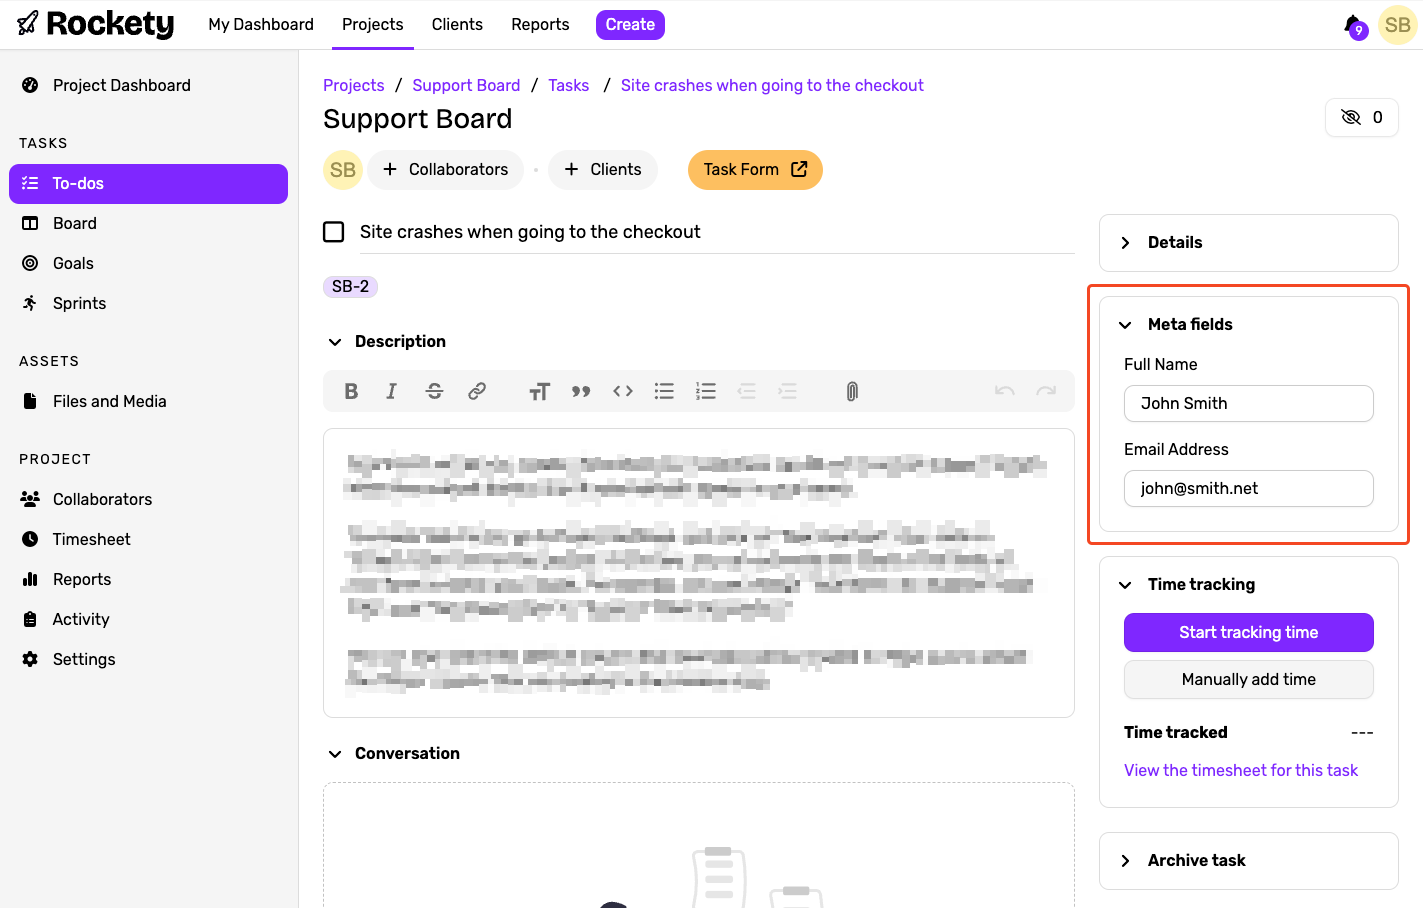
You'll then see these fields when you view the task in Rockety.
Conclusion
By following these steps, you can create a fully functional support ticket system using Rockety. Your customers will be able to submit support tickets via a form or email, and your team will be able to manage and resolve those tickets efficiently. With Rockety's powerful project management features, you can keep track of all your support requests in one place, ensuring that nothing falls through the cracks.
